Search This Blog

Wednesday, July 27, 2011

Indian Spiced Green Beans

Green Beans with Stewed split peas and potatoes and collard paratha
My sister planted a ginormous garden this year and I'm reaping the wonderful benefits.  Last week she gave me several bags of produce from her garden and today I turned them into an Indian vegetarian meal.


Flaky Collard Paratha


  The collards I blanched and processed
   into a dough I used to make paratha.


Raiti with fresh cucumber and tomato


The sweet, juicy tomato and crisp cucumber got chopped up and added to a tangy raita.


The green beans I fried in ghee with cumin and mustard seeds and then stewed them in a bit of water.  This recipe is so simple and quick that it qualifies as an Emmi.

This recipe comes from Yamuna Devi.  She has written one of the most comprehensive cookbooks on Indian Vegetarian Cuisine that I've ever seen!  The book is called Lord Krishna's Cuisine: The Art of Indian Vegetarian Cooking and no collection on Indian cooking can be considered complete without it.  If you don't own it, what are you waiting for?

Ingredients:
  • 1 lb green beans, cut in 1 inch pieces
  • 4 T ghee or light oil
  • 2 t black mustard seeds
  • 1 t cumin seeds
  • 1/4 t crushed red pepper (more or less to taste)
  • 1/2 c water
  • 1 t corriander
  • 1 t kosher salt
  • 1 t sugar
Method:
  1. Heat the ghee or oil over medium high heat.  Toss in the mustard seeds, cumin seeds, and red pepper.  The cumin seeds will turn dark reddish brown and the mustard seeds will turn gray and pop.  
  2. When the mustard seeds are done popping, add in the green beans and fry for about 3 minutes, stirring to coat with the seasoned ghee
  3. Add the water.  Lower heat to medium low.  Cover and cook until crisp tender (about 10 - 12 minutes.)
  4. Uncover and stir in corriander, salt, and sugar.  Raise heat and cook until water evaporates.
Indian Spiced Green Beans

To finish out my meal, I made stewed split peas and potatoes.  If you are interested in that recipe, click here.


Saturday, July 23, 2011

Salmon with orecchiette and horseradish cream sauce

Salmon and pasta with horseradish cream

The heat has been so brutal for so long now, that I think my brain has started to melt.  All my energy has been sizzled away and I find myself just laying around in a stupor, blinking at the foggy walls and ceiling.  Normally, I love to cook.  But lately, I've been too lazy to cook and too hot to eat.  My family has been forced to graze on salads.  Like these:

Salad with grilled veggies, salami, and goat cheese

Nicoise Salad with asparagus, new potatoes, and tuna fish

Cannellini and Fennel salad with roasted veggies

But, after a week of salads, I decided to drag myself out into the kitchen and cook up something a little more solid for dinner.  Feeling inspired by a recipe I found in an old issue of Bon Appetite, I cooked up a salmon and pasta dish that the whole family loved!  I think it was good enough to serve to company (my husband and I always rate a new dish by whether or not we'd serve it to company!)  I used salmon fillets (with skin on), baby broccoli (also called broccolini - it is a cross between broccoli and Chinese kale), caramelized onions, Parmesan cheese, and orecchiette.


Ingredients:


for the sauce
  • 1 cup clam juice (one 8 oz bottle)
  • 1 cup 1/2 and 1/2
  • 1 cup cream
  • 3 T prepared horseradish (not sauce)
for the pasta
  • 12 oz orecchiette (or any other fun pasta shape of your choice)
  • 1 1/2 lb onions, caramelized
  • 12 oz baby broccoli
  • 1 cup grated Parmesan
  • 2 T olive oil
for the salmon
  • 2 T olive oil
  • 6 6oz salmon fillets with skin on


Method:

for the sauce
  1. bring clam juice, 1/2 and 1/2, and cream to a gentle boil.  Let boil until reduced to about one cup
  2. whisk in horseradish 
  3. season to taste with salt and pepper.  set aside
for the pasta
  1. bring a large pan of salted water to a boil
  2. cook baby broccoli in salted water for about 3 minutes or until crunchy tender.  remove with slotted spoon
  3. cook pasta in salted water for about 11 minutes.  drain, reserving one cup of pasta water
  4. cut broccoli into pieces about 1 inch long
  5. return pasta to pan along with broccoli, caramelized onions, olive oil, Parmesan cheese and about 2/3 c of the reserved pasta water.  Mix well.  (If pasta seems dry, add remaining pasta water)
for the salmon
  1. heat 2 T olive oil in large pan
  2. season salmon with salt and pepper
  3. place salmon in pan, skin facing up, and cook for about two minutes, or until nicely colored
  4. flip over and continue cooking for another 3 minutes or until skin is crispy and salmon is just opaque in the center
To serve:
  • place some pasta in the middle of a serving plate
  • place a salmon fillet, skin side down, on top of pasta
  • drizzle sauce over fillet

Delicious!!!


Monday, July 11, 2011

Chicken and Swiss Chard Burmese Style


Every few days, I like to check the stats on my blog.  I usually have about a half dozen page views every day.  It's interesting to see where the traffic is coming from and what countries my readers are in.  The two posts that get the most views are the blog I did on Vietnamese Pork Chops and the one I did on Burmese Fried Noodles.  The Vietnamese Pork Chop recipe gets several views a day.  It seems a lot of folks are doing a google search for the recipe!

There are some serious food bloggers out there with thousands of followers and fans.  They post almost daily and their food photography is stunning!  Their dedication and enthusiasm makes me look like a slacker!  Never-the-less, I plod along, posting my mediocre food adventures and hoping somebody somewhere will read about them someday.  And even if they don't, I'm creating a collection of my family's favorite recipes that is much quicker and easier to access than pulling out cookbooks or note cards.

But a couple of days ago, when I checked my blog stats, I was stunned to see that overnight I had had 2,748 views to my post on Burmese Fried Noodles.  It seems all the visitors were referred by Stumbleupon.  How bizarre!  So, in an effort to repeat my one day success, I've decided to post another Burmese recipe.

This isn't an authentic Burmese recipe, however.  I recently acquired a cookbook called The Burmese Kitchen and while it has some pretty unusual recipes calling for odd ingredients, it also has a lot of very simple recipes.  One is for pork with Swiss chard and it calls for nothing more than some pork, Swiss chard, oil, garlic, and soy sauce.

My sister and her husband planted an amazing garden this year and she gave me a large bag full of Swiss chard last week.  Today, I decided to use some of it to make this simple dish.  I didn't have any pork, so I used chicken instead.  I also made a few other changes.  I don't know if my changes disqualify this as a Burmese recipe, but here's what I did.
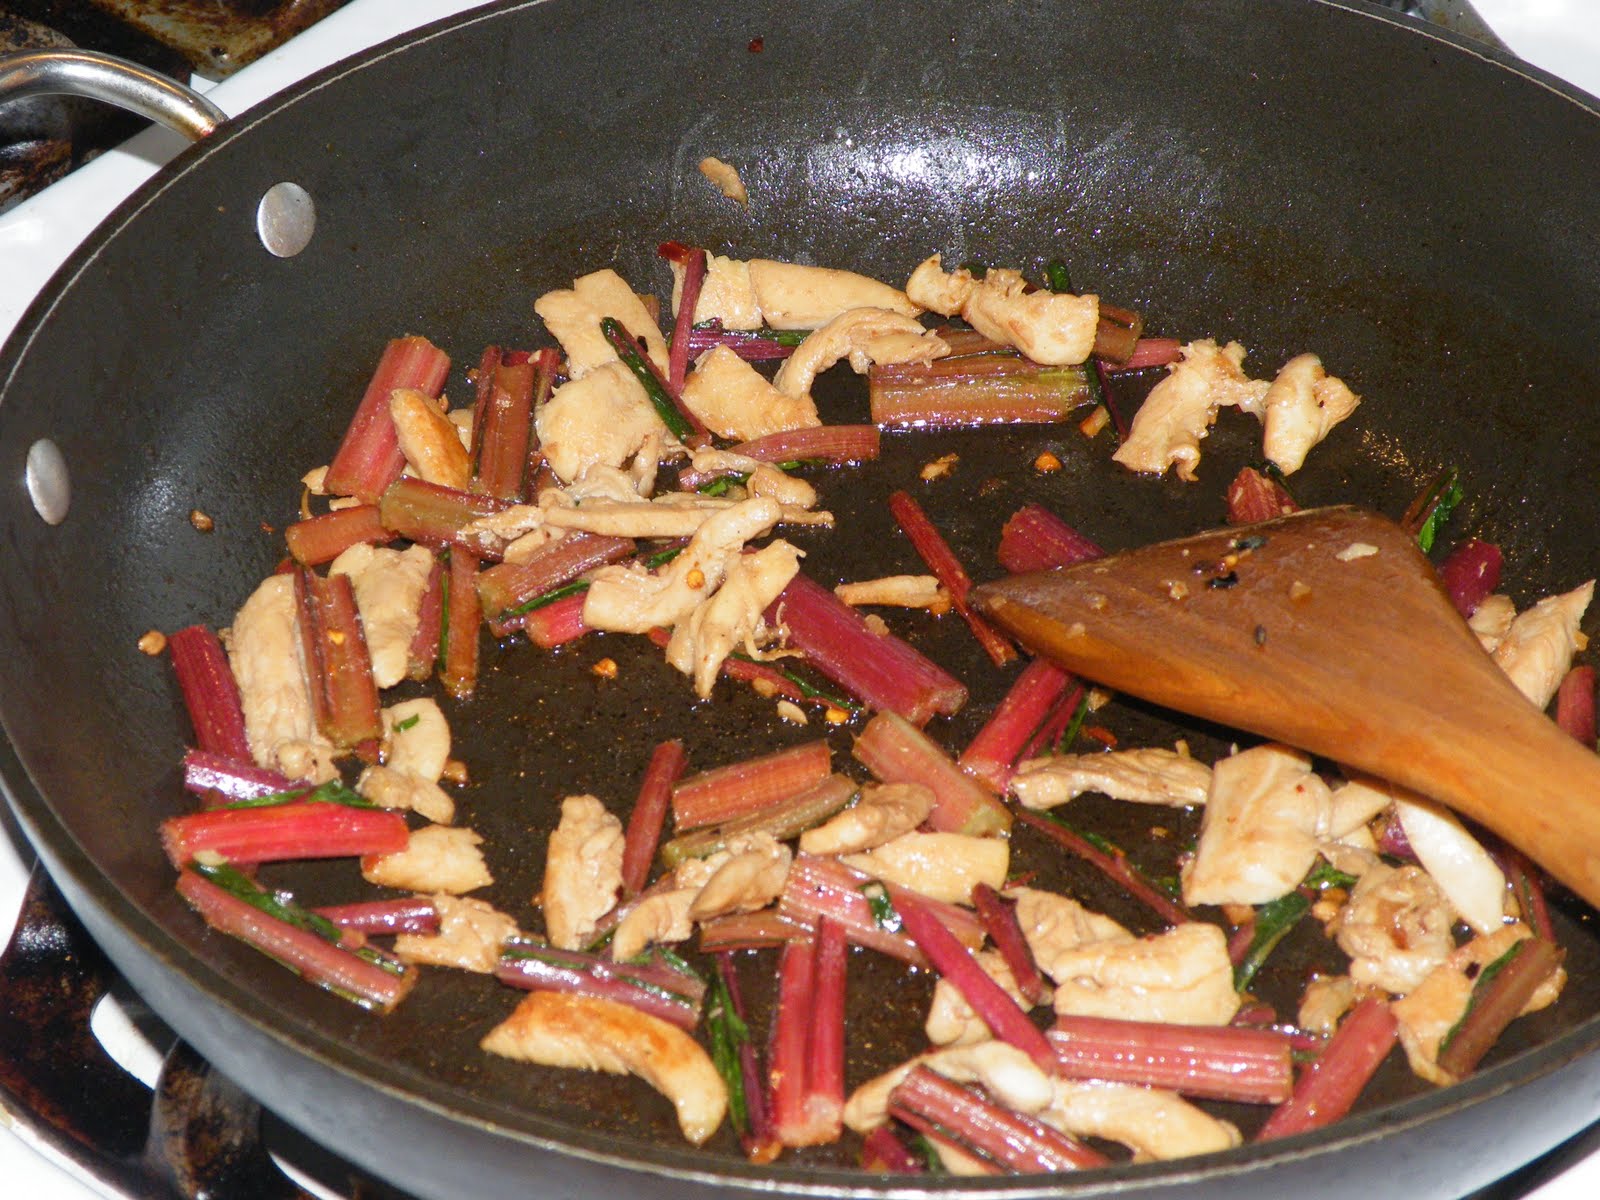
stir frying the chicken and chard stems

Ingredients:
1/3 lb chicken breast, sliced in skinny pieces
2 t mushroom soy sauce (more or less to taste)
1 T canola oil
1 large clove garlic, chopped fine
pinch of crushed red pepper flakes
1 heaping cup Swiss chard stems, cut into 1 1/2 inch lengths
4 cups Swiss chard leaves, sliced into ribbons

Method:
1.  sprinkle chicken with 1 t soy sauce and let set for 30 minutes or so

2.  heat oil in frying pan over medium/high heat.  toss in garlic and pepper flakes and stir quickly for about one minute, until garlic begins to turn golden

3.  add chicken to pan.  stir and cook until chicken begins to darken

4.  toss in chard stems and remaining soy sauce. continue stirring and cooking for about another 3 - 5 minutes or until chard is tender.  (be careful with the mushroom soy sauce as it is pretty salty.  you can always add more, but you can't take away!)

5.  toss in chard leaves and stir until wilted.  if you want a little moisture, drizzle in about a T of water and let the steam help wilt the chard.

I'm trying to limit my carbs and I ate this for lunch today without rice.  It was delicious, but would probably be good with rice too!

Sunday, July 10, 2011

My Grandma's Rhubarb Pie

Grandma's Rhubarb Pie

I know I'm not the only one who thinks that her grandma made the best pies in the world.  But mine really did.  Even people from outside the family said so!  My second cousin opened a restaurant in the area several years ago and she told me all the pies she served were made by her mother, who learned how to make pies from my grandma.  People raved about those pies and would go there to eat just for the pleasure of finishing the meal with one of their homemade pies.  My grandma passed away over 20 years ago and although I don't always make the right choices at the right time, thank God I had the good sense to spend some time with her in the kitchen before it was too late.  My grandma showed me how she made her delicious, flaky pie crusts in just a fraction of the time it took other folks.  She didn't bother rolling the dough out.  She mixed flour, a  little cold milk, a bit of sugar, a pinch of salt, and some vegetable oil together in a mixing bowl and then dumped it into a pie plate.

Pie dough dumped in a pie plate

Then she would pat the dough down into the plate until she had a beautifully formed pie crust.


This method takes about five minutes, start to finish, and the crust always turns out flaky and delicious.  Whenever I'm making fruit pies, I always hold out some of the dough clumps to crumble on the top of the pie before baking.

I loved all my grandma's pies, but my favorite was her rhubarb.  It's taken me a while to be willing to share her recipe, but good food should be shared with family and friends and perhaps, in this case, maybe even a few strangers.  In the tradition of most grandma's, she never measured things out and I've had to guess and adjust the amount of ingredients.  Although my pies are very good, they don't taste quite like Grandma's.  I don't know if it's because I'm missing that emotional element that made eating my grandma's food so pleasurable, but I've resigned myself to the possibility that my pies might never be quite as good as hers.  If you give this a try, do let me know how it turns out for you!

Ingredients:
2 1/2 c (more or less) chopped rhubarb (about 1 inch or smaller pieces)
1 T fresh lemon juice
1/3 c unsalted butter, melted
1/4 t salt
dash of cinnamon
2 c sugar (I don't like my pie real sweet so I use a bit less)
1/4 (scant) c flour
1 c half and half
1 9 inch pie crust

Method:
1.  Mix all the ingredients, except crust, in a large bowl.  Do this in the order listed, mixing after each addition (salt, cinnamon, and sugar can be added all at once) so that the ingredients blend correctly and adhere nicely to the fruit.

2.  Pour filling into pie crust (sprinkle crumbs on top if you saved any out, dot with butter and sprinkle with cinnamon.)

3.  Bake at 350 for one hour.  (Check to make sure it doesn't get too brown.  If the crust is browning too quiclkly cover lightly with tin foil.)

A slice of rhubarb pie with homemade ginger ice cream