Search This Blog

Wednesday, December 1, 2010

Chicken Tortilla Soup


I love the adventure of trying out a new recipe; but sometimes, I just don't have the drive nor the time to take a chance on something I may not like.  I have a collection of family-tested, quick to fix recipes that I fall back on time and again.  This chicken tortilla soup is one of them.  It goes together quickly and everyone loves it.  Plus, it's hardy enough that I don't really need to make anything else to go with it!

This recipe is adapted from one found in The Whole Foods Market CookbookDon't be put off by the seemingly long list of ingredients.  The recipe is really simple!

Ingredients:

2 T. canola oil
1 red or yellow bell pepper, diced
1 green bell pepper, diced
1 red onion, diced
2 cloves garlic, minced
2 t dried oregano
1 1/2 t cumin
1 t chili powder (such as cayenne)
1 jalapeno, chopped (I leave the seeds because I like the heat, but you can remove them)
1 14.5 oz can whole tomatoes, cut up with juice
4 cups chicken broth
1 lb boneless, skinless chicken thighs (or breasts, if you prefer)
1 15 oz. can black beans, drained
2 cups frozen corn
1/2 cup minced cilantro
salt to taste

For Serving:
blue tortilla chips
Monterey Jack cheese
diced avocado

Method:

1.  Heat oil in large pot and saute peppers, onion, garlic, oregano, cumin, and chili powder until onion is translucent.

2.  Add jalapeno and cut up tomatoes.  Stir and cook briefly.

3.  Add chicken broth and chicken pieces.  Bring to a boil.  Lower heat and simmer for 20 minutes or until chicken is done.  Remove chicken and cut into bite-sized pieces.

4.  Return chicken to pot along with black beans and corn.  Bring to a simmer and let simmer for 10 minutes to blend flavors.  Add salt and cilantro.

To Serve:
Crumble some tortilla chips into a bowl and top with a sprinkling of cheese.  Ladle hot soup over chips and garnish with avocado.

Tuesday, November 16, 2010

Fish Tea


Does that title sound disgusting to you?  It sounded very unappetizing to me when I first saw it on a menu in Jamaica last year.  But our Jamaican companion insisted it was delicious, so Eddy and I gave it a try.  All I can say is, YUMMY!

Fish tea is a traditional Jamaican dish.  It's not really a tea, but rather an aromatic, deliciously spicy soup.  We enjoyed it so much, that the next day we went back to the very same place and ordered the very same thing! 

Last week, Eddy came up to me and announced, "I'm in the mood for fish tea."  Well, it was 10:00 at night and there wasn't much I could do about it then, but the next day I searched online for a recipe.  Most of the recipes I could find online were for a clear broth with fish.  What we had enjoyed in Jamaica was a hearty soup filled with root vegetables, called ground provisions in Jamaica. 

I decided to improvise a recipe of my own and it turned out great.  I bought most of the ingredients at Saigon grocery store on Calhoun St. where they sell whole red snapper (frozen and cleaned) at a very good price.  I spent $33 but ended up with a big pot of soup that fed us for several days.


Here's how I made my Jamaican Fish Tea.....

Ingredients:

4 lbs whole red snapper, cleaned (you can use any other fish you'd like)
10 whole black peppercorns
3 bay leaves
handful of fresh thyme sprigs
2 bottles of clam juice
6 cups root vegetables peeled and cut into 1 inch cubes (I used sweet potatoes, malanga, and yuca)
2 chayote squash, peeled and diced into 1 inch cubes
12 scallions, chopped
2 medium onions, diced
3 large cloves garlic, crushed
1 habanero pepper (more or less to taste)
juice of 1 large, juicy lime
salt to taste

Method:

1.  Make sure fish is free of scales.  Cut in half and place in large soup kettle.  Dump in the clam juice and then cover the rest of the way with water.  Add the bay leaves, peppercorns and the thyme.  Bring to a boil over medium heat.  Reduce to a simmer, cover pot and simmer gently for about 30 minutes.

2.  Strain the broth and return to the kettle.

3.  Add the yuca, malanga, sweet potatoes (Caribbean sweet potatoes have white flesh), chayote, scallions, onions, garlic, and habanero and bring back to a boil.  Reduce heat and allow to simmer for 30 minutes.

4.  While the soup is simmering and once the fish has cooled enough to handle, use your fingers to remove it from the bones.  Add the fish to the pot as soon as you are done picking it from the bones and allow it to continue cooking with the vegetables.

4.  When the vegetables are tender, add the lime juice and salt to taste.

*Note: traditional Jamaican fish tea has plantains in it.  As I don't like them, I left them out.  If you like them, add them, but reduce the root vegetables appropriately. *

Monday, November 15, 2010

Suon Nuong (Vietnamese BBQ'd pork chops)


Those of us who live in Fort Wayne are lucky to have Saigon Restaurant where they serve up delicious tasting, authentic Vietnamese food at a very reasonable price.  After eating the BBQ pork rib they served me a few weeks ago, I decided I wanted to try making this dish at home.

I recently became the happy owner of an awesome cookbook called Secrets of the Red Lantern

This is more than just a cookbook; this is a family's story.  The author, Pauline Nguyen, is the daughter of Vietnamese immigrants to Australia.  Her parents ran a Vietnamese restaurant there and her book is filled with stories from her family's history, including photos from long ago and documents and letters, such as photocopies of their visa applications.  She also shares wonderful recipes from her family's kitchen and I found a recipe that seemed quite similar to the dish I had at Saigon.

This recipe is very easy and delicious!  I'm sure your family would be impressed with the results.  However, if you hate to cook and live in the Fort Wayne area.....  you can enjoy the same results by heading downtown for a meal at Saigon!

Ingredients:

3 lbs thin pork loin chops
1/4 cup oyster sauce
1/4 cup fish sauce
1 T honey
1 T sugar
1 stalk lemon grass, chopped (white part only)
1 bunch scallions, crushed (white part only)
1 clove garlic, crushed
1/2 cup canola oil

Method:

1.  Mix all ingredients, except for pork chops, in a bowl.

2.  Lightly pound or flatten pork chops.

3.  Place pork chops in a glass dish or one gallon size plastic bag and cover with marinade.  Marinate overnight.

4.  Remove pork chops and grill or broil until done.

How easy was that??!!!  These pork chops are traditionally served with Vietnamese dipping sauce and garnished with thinly sliced bird chilies and cilantro.  I served mine with rice, grated carrot, and thinly sliced cucumbers. 


If you'd like to make the dipping sauce, here is the recipe:

Ingredients:

3 T fish sauce
3 T rice vinegar
2 T sugar
2 cloves garlic, crushed
2 bird's-eye chilies, sliced
2 T freshly squeezed lime juice

Mix all ingredients well, until sugar dissolves.

Monday, November 8, 2010

bits and pieces......

Two months!  Are you kidding me?  I can't believe I haven't posted anything for almost two months.  It certainly isn't because I haven't been cooking!  I was planning to use as my excuse, the fact that Eddy and I were busy traveling the west coast.  But we've been back for almost four weeks, so I guess I can't really use that excuse anymore....

We had such a great time eating our way down the coastline.  We started in Seattle, WA and ended up in Newport Beach just south of Los Angeles.  My hands-down-favorite meal was the dim sum we had in Seattle with our friends Mary and Jeremy (thanks guys!)


I also enjoyed my first Korean BBQ.  Eddy and I had some friends from Korea years ago and she used to make the most delicious bi bim bop and other wonderful Korean dishes.  But I'd never had Korean BBQ; so that was really fun!  The meat was cooked to order over a pit BBQ in the middle of the table.


Then, the meal was served with rice and little dishes of Korean vegetables, such as bean sprouts, spinach, kimchee, and my favorite, potatoes.


Eddy and Jeremy decided they wanted to try the traditional wine of Korea.  It was milky white and was, in my opinion, the only item that should have been sent back!


We had a very nice stay at a Bed and Breakfast in Napa Valley.  Our hosts made a spot-on eggs Benedict for breakfast and the fresh fruit they served was so sweet and juicy, I could hardly stop moaning in delight!


I also enjoyed my very first "fresh" fig, which I picked right off the tree near our balcony!  It was sticky and delicious!


Since coming home, I have continued to try new recipes.  Here are some pictures of recent adventures:

coconut mango sorbet

Thai red curry noddle soup

rustic spinach and cornmeal soup

butternut squash gnocchi

banana stuffed french toast with strudel topping

chili relleno tart (my personal favorite!)


Today, I'm in the mood for Jamaican fish tea.  Eddy and I had an amazing bowl of the stuff when we were in Jamaica.  It was so wonderful, we went back the next night and ordered the exact same thing!  I'm on a search for a good recipe and if I find one, I'll post all about it!

Thursday, September 16, 2010

Eggplant and roasted garlic tart


I love eggplant!  It is so versatile and delicious; it can be baked into casseroles, mashed into purees and dips, grilled for salads, sliced and fried as an appetizer, pureed into soups, and even baked into pies like the one pictured above.

I have this fantastic cookbook called Fields of Greens by Annie Somerville.  It is a collection of vegetarian recipes from her restaurant, Greens Restaurant, in San Francisco.  I've tried several recipes from this book and have yet to run across something that doesn't turn out delicious!

With the abundance of locally grown eggplant (in all its many varieties) available around town from farmer's markets and roadside stands, I decided to give her recipe for eggplant and roasted garlic tart a try.  It turned out fantastic!


roasted garlic, eggplant, and sun-dried tomatoes in a tart shell


all ready for the oven with imported provolone, eggs and half-and-half poured over top


slice and serve with garden fresh tomatoes......YUM!

INGREDIENTS:
1 recipe tart dough
1 head of garlic
2 T olive oil
1/2 Japanese eggplant, sliced 3/4 inch thick on the diagonal
3/4 T chopped fresh oregano
3 eggs
1 1/2 cup half-n-half
2 ounces imported provolone cheese, grated
2 sun-dried tomatoes packed in oil, drained and thinly sliced

METHOD:

1.  line a tart pan with the dough

2.  preheat oven to 375.  Brush the garlic head with olive oil and roast on a pan until soft (about 30 minutes)  Remove from oven and when cool enough to handle, squeeze the cloves out of their skins.  Reserve half and mash the remaining half into a paste.

3.  Brush eggplant slices with olive oil, salt and pepper and place on a large baking sheet.  Roast in the same oven until soft, about 15 minutes.  Remove and when cool, slice each into 2 or 3 strips.

4.  Beat the eggs in a bowl and whisk in the mased garlic, the half-and--half, 1/2 t salt and pepper to taste.

5.  Spread the grated cheese on the bottom of the tart shell.  Lay the eggplant slices on the cheese, followed by the roasted garlic cloves and the sun-dried tomatoes.  Pour the custard over all and bake for 40 minutes or until the top is golden and the custard is set.

Monday, August 16, 2010

A Delicious and Easy Sambhar


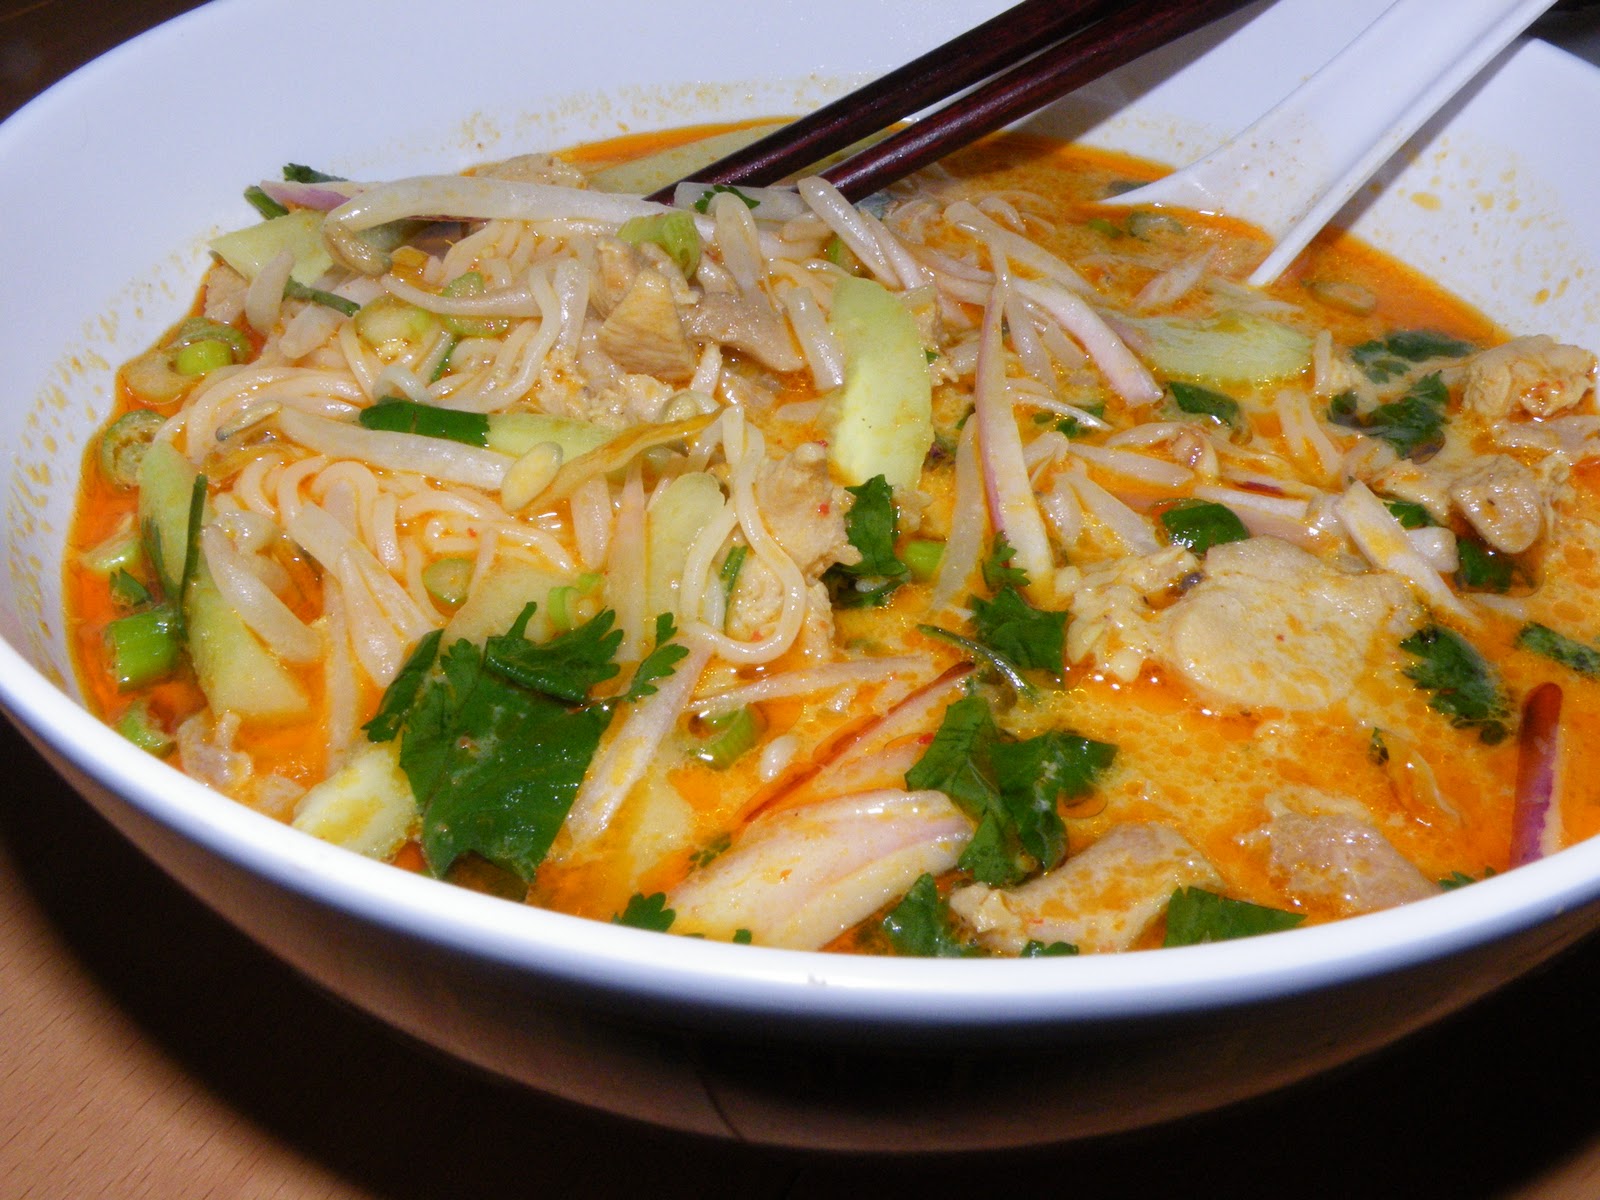
I am waiting for the day when the Internet has a smell option.   If it were possible for you to smell the vadaa sambhar pictured above, I could probably get rich offering to sell you the recipe.  The day I made this sambhar,  my whole house had a warm, spicy smell that made my nose tingle and my stomach rumble!

A local bookstore is, unfortunately, going out of business and all their books are currently 50% off.  I picked up a cookbook titled 660 Curries  by Raghavan Iyer.  The same day I purchased the book, I came home, randomly opened it up and made the first two recipes that caught my eye.  This sambhar was one of them.  (Yes, my sister will ridicule me, but I had all the needed ingredients in my superbly stocked kitchen and didn't have to run out for anything!)

I will admit that Indian cooking can be a bit intimidating for the uninitiated.  They do such creative things with their food!  Especially the vegetarian cuisines.   But if you take the time to read the recipe through and understand the steps, you will see that it really isn't as hard as it would seem at first glance.  Some procedures are time consuming; such as making your own cheese or yogurt or making dumplings out of lentils.  But again, these procedures are lengthy, but EASY since most of the time required is sitting time where the cook is not active; such as soaking or fermenting.

If you want to try a delicious recipe that is almost as simple as boiling water, follow this link to my Examiner article on the Taj Mahal Grocery and Gift store and try the recipe for stewed potatoes with yellow split peas.  It is amazingly simple and amazingly delicious!  If you are feeling just a bit more adventurous, try this recipe for vadaa sambhar (lentil dumplings in a vegetable stew.) 

For the Dumplings

ingredients:

1 cup skinned split black lentils (urad dal)
1 1/2 t sea salt
Canola oil for deep frying

method:

1.  Place the dal in a medium-sized bowl.  Rinse in several changes of water until water is no longer cloudy.  Cover the dal by several inches with clean, fresh water and let soak from 1 to 4 hours.

2.  Drain the dal.  Place 1/2 cup water in a blender.  Add dal and puree, scraping down the sides of the bowl, until a paste is formed.  Dump paste back into medium-sized bowl.  Add 1/4 c water to blender and swirl around.  Add this water to the paste and stir it in.

3.  Pour about three inches of oil into a wok or medium-sized pan.  Heat until a drop of water dances across the surface (350 degrees on a thermometer.)  Drop the batter into the oil by large tablespoons and fry, turning occasionally, until they are golden brown all over.  Remove and drain on paper towels.  Do this in several batches being careful not to crowd the pan. 

4.  When all the batter has been fried, set the dumplings aside and make the stew.

For the Stew

ingredients:

1/4 c. oily toor or toovar dal (skinned split yellow pigeon peas)
1 T tamarind paste or concentrate
1 T sambhar masala
1 1/2 t coarse kosher or sea salt
1/2 t asafetida
1 medium-size red bell pepper, cut into 1-inch pieces
1 small red onion, cut into 1-inch chunks
20 fresh curry leaves
1 T canola oil
1 t black mustard seeds
2 T finely chopped cilantro

method:

1.  Place the dal in a small saucepan and rinse in several changes of water until the water is no longer cloudy.  Drain.  Add 3 cups fresh water to the pan.  Bring to a boil.  Reduce heat and simmer for 25 minutes.

2.  Meanwhile, whisk the tamarind paste with 2 cups of water in a medium saucepan.  Add the masala, salt, asafetida, bell pepper, onion and curry leaves.  Stir and bring to a boil.  Reduce heat and let simmer until vegetables are fork-tender (about 15 minutes.)

3.  When the dal is done cooking, pour it into a blender and blend well.  Pour this thin broth into the stew pan with the vegetables.

4.  Heat a small skillet over high heat.  Add the oil and sprinkle in the mustard seeds.  They will pop, much like popcorn (you might want to cover the pan during this process.)  When the popping stops, scrape the seeds into the stew along with the cilantro.

To Serve

Place a couple of dumplings in a bowl and ladle some of the hot stew over.  Eat and enjoy!

Thursday, August 5, 2010

Portobello mushrooms stuffed with spinach and sun-dried tomatoes


I've been gone so long, it's doubtful I have any followers left at all, but just in case......   I've come to share the promised recipe for stuffed mushrooms.  But before I share the recipe, I must make my excuses!  Firstly, I just returned a few days ago from a trip to Haiti, where I went for days and days without an Internet connection making it impossible for me to blog!  You can read about my visit to a Haitian kitchen by clicking this link.  Secondly, shortly before leaving on my trip, I began writing articles for an online magazine called Examiner.com.  My articles are food focused (surprise! surprise!) with a local connection.  If you are interested, you can read my articles by clicking this link.

Now, back to the mushrooms.  I found this recipe in a book called Crescent City Collection.   It's a fabulous cookbook that I purchased in New Orleans when Eddy and I where there celebrating our 20th anniversary.  If you can get your hands on this cookbook, I recommend you purchase it!  So far, everything I have tried from its pages has turned out delicious!  These mushrooms are very easy to make and always bring me compliments when I serve them to guests.

Here is my edited version of the recipe for spinach-stuffed mushrooms:

Ingredients:

1 recipe Red Wine Vinaigrette (see below)
6 large portobello mushroom caps
Olive oil
1 small onion, finely chopped
1 large clove garlic, minced
a squeeze of lemon juice
3 tightly packed cups of spinach,
8 sun-dried tomatoes, packed in oil, drained and and chopped
hot sauce to taste (I prefer a habanero sauce over Tabasco)
salt & pepper to taste
1/4 cup freshly grated Parmesan cheese

Method:

1.  Marinate the mushroom caps in the vinaigrette for several hours

2.  Heat a swirl of olive oil in large saucepan over medium heat.  Add the onion and garlic and saute until tender.

3.  Add the lemon juice, spinach, and tomatoes and continue to saute until the spinach wilts.  Season with s&p and hot sauce.

4.  Remove the mushrooms from the marinade and broil (or grill) for about 6 minutes per side.  Let cool.

5.  Place the mushroom caps on a baking sheet and sprinkle half the Parmesan over the insides.  Mound the spinach mixture equally into each cap.  Sprinkle with remaining Parmesan.  (the recipe can be made ahead to this point.)

6.  Just before serving, broil the stuffed mushrooms until cheese is golden (about 5 minutes).

For the Red Wine Vinaigrette

Combine and whisk until well mixed:

2 T red wine vinegar
1/2 cup olive oil
3 t Dijon mustard
1/2 t sugar
1/2 t salt
1/2 t pepper
1 t chopped chives


Friday, July 2, 2010

Moroccan Roasted Seafood


Last night, I entertained The Amazing MattaMatta was an incredible host to me while I was in Athens.  She was like a mother, sister, and best friend all rolled up in to one!  She is visiting here in Fort Wayne for a few days and it was important to me that I create a meal worthy of someone with her high rank and standing.  I decided to make Moroccan roasted seafood.  Let me just say this...... if you try this recipe, after you are finished finger-licking your plate, you are going to rush to your computer and email me a thank-you letter.  It's very good; and oh, so simple!  The original recipe comes from The Whole Foods Market Cookbook.  Here is my version, with slight variations.

Marinade:

1/2 cup olive oil
2 large cloves garlic, minced
1 T curry powder
1/2 t turmeric
1/4 t cinnamon
1/4 cup fresh squeezed lemon juice
1/2 T Indian chili powder (or cayenne pepper)
3 T soy sauce
1 t salt

Mix together all ingredients for marinade.

Seafood and Vegetables:

2 lbs seafood (I used 1 lb sea bass, 1/2 lb salmon, 1/2 pound large shrimp (peeled and deveined) and 1/2 lb bay scallops)
1 large red onion, cut into chunks
2 medium red peppers, cut into chunks
2 medium green peppers, cut into chunks
lemon juice and cilantro for serving.

1.  place seafood in one large plastic bag and vegetables in another.  Pour half of the marinade in with the seafood and the other half in with the vegetables.
2.  Marinate for 30 minutes.
3.  Dump the seafood out on a large baking pan.  Separate the pieces as much as possible so they will roast nicely.  Roast at 450 for 15 minutes.  Remove and set aside.
4.  Roast the vegetables in the same way for 20 minutes.
5.  Combine the seafood with the vegetables, squeeze a little lemon juice over all and mix gently.
6.  Garnish with cilantro.
7.  Serve hot if desired but this is also fantastic at room temperature!

The seafood was amazing, but so was the rest of the meal.  I started of with an Indian Mulligatawny soup that is creamy and delicious with dal, coconut milk, and spices; hummus with home-made pita chips; little dishes of antipasto purchased at Fresh Market; couscous with dried cranberries and almonds; portobella mushrooms stuffed with spinach, sun-dried tomatoes, and Parmesan cheese; and for dessert my to-die-for coconut creme brulée .  I'll be sharing the recipes for the Mulligatawny soup and the stuffed mushrooms soon!

Friday, June 25, 2010

"Light My Fire" orange roughy


OH!!!!  I've been so busy lately!  I just got invited to be a contributor to an online magazine called Examiner.com.  My title is Fort Wayne Cooking Examiner and I am suppose to write articles about food and cooking that have a local angle.  For my first article, I featured my friend, David Rezits, and his cookbook, Culinary Harmony.  You can read the article  here.   In the article, I share a recipe from the book called "Light My Fire" orange roughy.  I first tried this recipe years and years ago when I was doing recipe editing and testing for the cookbook.  But I decided to make it again tonight.  It can be a little bit challenging to find orange roughy in Fort Wayne, but I found some at Fresh Market and ohhhh! the dish turned out so delicious!

If you want to try the dish, click on the link above and scroll through the article.  I have the recipe printed there.  Yesterday, I made 17 cents as a result of people viewing and reading my article.  If everyone reading my blog visits the site, maybe I can double my pay for toady!!!

Wednesday, June 23, 2010

Totally Vegan


When it comes to preparing delicious and creative vegetarian dishes, Indians are the world-class champions, hands down!  O.K.  So that's just my opinion.  But seriously, who else would ever come up with the idea to pulverize dried legumes with spices and warm water, let it ferment and then use the batter to make lacy, thin pancakes stuffed with spicy potatoes?  Who would think to "temper" spices and seeds in hot oil and then stir them into dals and curries just before serving?  Or, who else would think to make kafta ("meatballs") out of grated vegetables and chickpea flour and then simmer them in an aromatic sauce made with fresh tomatoes and ground nuts?  Thank God for the Indians!!!

I would LOVE to become an expert at preparing Indian food, especially vegetarian dishes such as spicy sambars and stuffed breads and fiery hot vegetable curries.  When I lived in India, I spent almost every morning sitting in the kitchen with Krishnabay, watching and helping as she prepared food for the mid-day meal.  She could expertly roll out chapatis, one right after the other, while simultaneously chopping vegetables for curry, pounding ginger/garlic paste, cleaning meat, grinding spices, AND tending to her infant daughter.  All at the same time!  She was amazing!!!

I have a couple of excellent cookbooks on Indian vegetarian dishes.  One by Julie Sahni, and the other by Yamuna Devi.    The other day I pulled them out and chose a couple of dishes to try.  I made squash kaftas in spicy tomato sauce, and spicy bell peppers and eggplant.  I over-salted the eggplant dish (my bad!) but the zucchini balls were amazing!!!!

 
The recipe for the zucchini balls comes from Julie Sahni's cookbook, Classic Indian Vegetarian and Grain Cooking.  The tomato sauce is made with fresh tomatoes, and since I got my first batch of juicy, summer tomatoes from Country Gardens Monday, I decided to use them to make the sauce and give this recipe a try.  If you are feeling the least bit adventurous, you should try it too!  Again, this is sort of a lengthy process, but very simple.  First, make the sauce because it needs to spend some time sitting.  Overnight is best, but I was in too much of a hurry and only let mine sit for a few hours!

In a blender or food processor, blend together
   4 medium-size tomatoes, quartered
   6 hot green chilies
   1 1/2 inch piece fresh ginger, peeled

Over medium-high heat, heat 5 T peanut oil.  When the oil is hot, stir in
   2 t ground cumin
   1/2 t turmeric
   2 T ground almonds
   2 t paprika
   2 t garam masala

Add in the tomato sauce and bring to a boil.  Lower the heat and simmer for 20 minutes.  Let the sauce cool and then set it aside for several hours or overnight in the refrigerator.

For the Spicy Yellow Squash Kafta, mix together:
   2 pounds yellow summer squash or zucchini, grated
   1 medium-size onion, grated
   3/4 cup chickpea flour 
   1 T ground coriander
   1/4 t red pepper
   2 - 4 hot green chilies, finely chopped
   1/4 cup chopped cilantro
   1/4 t baking powder
   salt to taste

Heat enough oil to give you about 2 - 2 1/2 inches of depth to 375 degrees.  When the oil is hot, scoop up about a tablespoon or so of the vegetable mixture and form it into a ball shape.  Gently drop it into the hot oil.  Repeat with remaining mixture.  Do not overcrowd the pan.  You will need to do this in several batches.  Remove the balls when they begin to turn a golden brown and drain on paper towels.  The batter does not contain eggs and is extremely fragile so you will have to work carefully.  I found this to be the most difficult part of the process.  If you are not using a deep fryer (as I wasn't) be very careful as you loosen the balls from the bottom of the pan.

When you are ready to assemble the dish, rewarm the tomato sauce over medium-low heat.  (Add water, if needed, to bring the volume of the sauce up to 3 1/2 cups.)  Then, gently place the kafta into the sauce and heat until hot.

As I was looking for other cookbooks by Sahni, I discovered that she teaches classes in New York.  She offers a 3 1/2 day intensive cooking course that covers all aspects of Indian cuisine.  She keeps the classes small, never taking more than three students at a time.  The cost?  A mere $2,700.  I'm sure my wealthy, generous readers would like to help me with the cost of attending one of these classes.  You may do so by clicking on the donate button at the top right of this blog!!!

Wednesday, June 16, 2010

A couple of vegetarian pasta recipes


How fortuitous was it that I should stumble over a pasta recipe calling for swiss chard just days after bringing home a bagful of the leafy greens from Country Gardens?  After my disastrous asparagus pie the other day, I was a bit hesitant to try another vegetarian recipe, but I really wanted to try something different with the swiss chard so I decided to give it a go.  The finished dish actually turned out better than I expected.  I loved the little bites of sweet raisins and the nutty crunch of the pine nuts.  I don't think it's the kind of dish  your family will drool over and beg you to make again and again (at least not if they're anything like mine), but it would probably delight any vegetarian dinner guests or swiss chard lovers you might find yourself preparing a meal for.

The recipe calls for a "bunch" of swiss chard.  What constitutes a bunch is pretty much up to you.  I used, well..... a BUNCH.  Before beginning the recipe, prepare the swiss chard by cutting out the stems; then thinly slice enough stems to give you about 1/2 cup and toss the rest away (or save for some other creative use.)  Slice the chard leaves into ribbons about 1/4 inch thick.  Now you're ready to start the recipe.

In a large skillet, melt
   6 T butter

Let the butter cook over medium heat until it turns a nutty brown then add in
   chard leaves, sliced
   4 cloves garlic, crushed

stir until wilted (about 3 minutes) and then toss in
   1 bunch of spinach leaves

again, cook and stir until wilted then stir in
   1 1/2 t lemon juice
   1/4 cup golden raisin that have been plumped for 10 minutes in hot water and then drained

For the pasta, cook according to package directions
   12 oz linguine
   1/2 cup swiss chard stems (toss in when you add the pasta)

Drain the pasta and swiss chard stems and mix in the wilted greens.  Stir in
   1 1/3 cup grated Parmesan
   1/3 cup toasted pine nuts
   1 T chopped chives
   2 t chopped fresh thyme

Salt and pepper to taste.

Along with a bag of swiss chard, I brought home something called garlic scapes.  These are the beautiful, curly tops of garlic plants.  They aren't nearly as strong as garlic, but have a wonderful garlicky taste.


To be honest, I wasn't quite sure what to do with these so I looked them up online.  I found a simple recipe for pesto made with garlic scapes and decided to give it a try.  It had a very "green" smell but the taste was much more mild.  My son had two bowls of farfelle with garlic scape pesto and he thought it tasted "pretty good."  If you'd like to try the pesto you'll need about one cup of sliced garlic scapes.

In a food processor, blend
   1 cup sliced garlic scapes
   1/3 cup walnuts

with the processor running, slowly pour in
   3/4 cup olive oil

add in
   1/4 - 1/3 cup grated parmesan
   1/2 t salt

pulse until well combined.
  

Tuesday, June 15, 2010

Food not fit for a dog


I sometimes read a food blog called Closet Cooking and the other day I saw this interesting recipe for an asparagus filo pie with avgolemono sauce that I really wanted to try.  When I found asparagus at Hill's market for only .99 cents a pound, I decided NOW was the time.

Although working with filo dough can be a bit intimidating for the uninitiated, it really isn't that difficult and the recipe was very simple and went together quickly.  It had layers of chopped asparagus, walnuts, and dill, alternating with cheesy layers of mozzarella, ricotta, and feta.  As I chopped and layered in my kitchen, I whistled a happy tune, my heart full of joyful anticipation.  I was sure I was on the brink of discovering another deliciously unusual recipe I could serve to my vegetarian friends.

One hour later, I sat slumped in disappointment, a half-eaten square of asparagus pie on my plate.  I simply did not like this dish!  The filling was bland and the sauce was way too tart.  I could hardly gag it down.  When my husband, Eddy, asked for a piece I begged him not to get involved.  He thought I was exaggerating and insisted on trying a piece of his own.  A few minutes later, I caught him trying to feed it to the dog.  Not even Allie (who is famous for showing no discrimination at all in matters of the palate) would have anything to do with it.  She turned up her nose at the offered pie and headed off to the cat box to look for something tastier.

It pained me to scrape the whole thing (minus two pieces) into the trash.  But I was left without any other options!  Never-the-less, as I closed the lid on the trash can, I found myself wondering, "what if I would change the sauce and spice up the filling......."  I may just try this recipe again with some changes of my own.  In the meantime, it sure took a pretty picture!

Monday, June 7, 2010

What to do with lemon balm

Last week, I got a bag of lemon balm from Country Gardens.  I have been wanting to try this chicken salad recipe for several years and now I finally had the chance!  It's a beautiful salad, tasty, and made with healthy fruits and veggies.  You can pretty much figure out how to make it just by looking at the picture.  It has avocado, red beets, papaya, watercress, chicken, and walnuts.  (I took the picture before I sprinkled on the walnuts!)  The chicken and the dressing are really the only things that need explaining.

For the chicken, preheat the oven to 350.  Place two whole chicken breasts (with skin and bones) in a lightly greased baking dish, sprinkle with s & p and drizzle with about 1 T of fresh lemon juice.  Cover tightly with foil and bake until done (anywhere from 30 to 50 minutes depending on the size of the breasts).  Be careful not to let them overcook or the meat will be dry and chewy.

When the chicken is done, let it cool, remove the skin and tear it from the bone in large shreds.

Mix together:
  1/4 cup olive oil
  1/4 cup dry white wine
  2 T finely chopped lemon balm
  2 T finely chopped onion

Pour the above over the chicken and let marinate in the refrigerator for at least two hours.

For the dressing, combine in a blender or food processor and process until well blended:
  2 shallots, chopped
  2 T honey
  3 T chopped lemon balm
  2 T dry white wine
  2 T fresh lemon juice
 1 T Dijon mustard
 2/3 cup olive oil

To assemble the salad, place salad greens of your choice on a plate and artfully arrange all the remaining salad ingredients on top of the greens.  Sprinkle with chopped walnuts and drizzle with the dressing.

After making the salad, I still had enough lemon balm left to make a loaf of Rhubarb Lemon Balm Tea Bread.  My son, who believes he doesn't like rhubarb, loved this bread and couldn't stop eating it!

Preheat the over to 350.  Grease a 9 X 5 inch loaf pan.  Line the bottom and sides with wax paper.
In a large bowl, combine:
  1 1/2 cup brown sugar
  2/3 cup canola oil

In a small bowl, beat together
  1 cup buttermilk
  1 egg
  1 t vanilla

Combine the brown sugar mixture and the buttermilk mixture.  Blend thoroughly.
In another bowl, combine:
  1 t baking soda
  1 t salt
  2 1/2 cups flour

Stir the above into the brown sugar mixture and fold in
  1 1/2 cup chopped, uncooked rhubarb

Pour the batter into the prepared pan

Combine and then sprinkle over the top of the loaf:
  1/4 cup sugar
  1/3 cup finely chopped lemon balm
  1 t lemon zest
  1 T unsalted butter, at room temperature


Bake for 60 minutes or until a toothpick inserted in the top comes out clean.  Let cool in pan for 10 minutes and then cool completely on a wire rack.  Remove the wax paper after the loaf is cool.

You have to be careful when handling this loaf.  It's fragile!  Be gentle when you slice it.

Friday, June 4, 2010

What I did with week 1


This is my first week as a member of Country Garden and Farm Market.  My first bag of organic produce contained: pea tendrils, strawberries, lettuce, arugula, fava beans, onions, lemon balm, and thyme.  I was pretty excited about the pea tendrils as I have seen them called for in a lot of Asian recipes but have never had any luck finding them.  Unfortunately, I didn't use them to try any of those recipes as I didn't feel I had enough to cook.  I'm sure they would have cooked way down.  So I used them to make a salad instead.  I made a salad with pea tendrils, strawberries, and cucumber and drizzled it with balsamic vinegar sweetened with a little honey.


I was also excited about the chance to try another fava bean recipe.  After the labor-intensive effort of removing them from their pods and shells, I sauteed them in olive oil with garlic and prosciutto.  I finished them off by glazing them with a little balsamic vinegar and sprinkling on some finely chopped mint.  The fava beans in this batch weren't quite as sweet and tender as the ones from a couple of weeks ago, but they were still very tasty.  I think their season must be about over!

The arugula also got turned into a salad.  This salad was a bit more time consuming.  I tossed the arugula with caramelized red onions, candied walnuts, goat cheese, and croutons and drizzled it with a balsamic vinaigrette.  It was so delicious!


But my favorite was probably the poppy seed strawberry shortcake that I made with the sweet, delicious, organic strawberries!


The thyme will be used to make Haitian food as this is a key ingredient in almost every Haitian dish!  I'm not sure yet what I'll do with the lemon balm, but I've been eyeing a recipe for a chicken and fruit summer salad that calls for lemon balm, so maybe I'll give that a try.  Does anyone else have any suggestions on how to use lemon balm?

Overall, I was pretty happy with my first week of produce.  My only complaint would be the quantity.  A full bag is supposed to feed four people, but except for the strawberry shortcakes, the quantities I received barely made two servings.  Maybe that's because it's early in the season?  I'll have to wait and see what happens as we get further into the summer.

If you would like details on any of the recipes I made, let me know and I'll post or email you with the recipe!

Wednesday, May 26, 2010

Supper in under an hour.....


When I don't have a lot of time to cook or don't feel like spending a lot of time in the kitchen, I have a collection of quicky stand-by favorites that I turn to again and again.  One of the things my entire family loves is salmon cooked almost any way, but especially teriyaki.  I've experimented with lots of different teriyaki glazes.  I like a thick glaze and have found the best way to do this is to heat the glaze up with a cornstarch slurry. 

Tonight I made supper in under an hour, start to finish, and that includes dessert.  However, if there is a more messy, more unorganized cook anywhere on the planet, I would like to meet him or her! 

It doesn't matter how hard I try: my kitchen turns into a complete disaster when I cook.  Things happen to me.  Like, my clothes get caught on something and when I turn to disentangle myself, I knock something off the counter.  I spill things on the floor.  I cut myself on the lids of tin cans.  I drop eggs into the wrong bowl.  And I generate SO MUCH garbage!

But I always get the kitchen cleaned up before eating.  That way, I can enjoy my meal without the pressure of knowing I have a huge mess waiting for me.

Tonight, I made teriyaki salmon cooked under the broiler.  To go along with it, I made a barley salad filled with veggies and tossed in a sesame/soy dressing.  And I made a salad of thinly sliced daikon and cucumber in a sweet/sour marinade.  The cucumber salad was delicious and went really well with the salmon!

The barley took 45 minute to cook and while it cooked, I chopped the veggies and made the dressing.  I did this early in the day so the barley would have time to cool.  Just before dinner, I sliced the cucumber and daikon, made a quick marinade with rice vinegar, sugar, and a little salt, tossed it together and stuck it in the fridge while I made the salmon. 

For the salmon, I made a standard teriyaki glaze, dipped the salmon in the glaze and stuck it under the broiler for about 10 minutes.  While it was cooking, I tossed the barley salad together.

For dessert, I made a banana cream pie.  (Yes, that's right.  A dessert that does NOT involve coconut!) Years ago I sold Pampered Chef and this is a recipe I remember from my days as a Pampered Chef consultant.  It goes like this:

Mix together
   3/4 cup graham cracker crumbs
   2 T sugar
   1/2 cup melted butter

Press into the bottom of a nine-inch pie pan or spring-form pan

Mix together
   12 oz Cool Whip
   1 cup sour cream
   1 package instant vanilla pudding

Spread half of this mixture over the graham cracker crust and top with
   3 sliced bananas

Cover with the remaining Cool Whip mixture.
Sprinkle with chopped pecans.

This pie sets up quickly.  It doesn't need more than 30 minutes in the refrigerator!  So YUMMY!!!